Choosing the right fence is a crucial stage in planning a property. Wooden fences or wire mesh panels are often temporary and less aesthetic solutions. That’s why many homeowners, once the house is built and the budget stabilized, opt for a permanent masonry fence. One particularly valued material is clinker – durable, weather-resistant, and extremely elegant. So how do you properly build a clinker fence? Here’s a detailed guide.
Why choose a clinker fence?
A clinker brick fence is not just a protective barrier against intruders, but also a key visual element that enhances the prestige and character of a home. Clinker bricks stand out due to:
- low water absorption, making them resistant to rain and frost,
- long-lasting color, which doesn’t fade over decades,
- no need for regular maintenance.
However, long-term satisfaction with a clinker fence depends on proper construction. Below we describe the process step by step.
Foundations – a solid base for the entire fence
Construction should begin by planning the fence layout and precisely marking it on the ground. Then, the foundation strip can be poured.
-
Foundation depth depends on the soil type and frost zone.
-
In expansive soils (which swell when frozen), the foundation must reach below the frost line – typically from about 80 cm to even 140 cm, depending on the region.
-
In non-expansive soils, a depth of around 60 cm is usually sufficient.
-
Foundation width typically matches the wall thickness of the fence.
-
Don’t forget about expansion joints – gaps filled with materials like roofing felt to allow the concrete to move naturally.
Horizontal insulation and first bricks
After the concrete sets and formwork is removed, install horizontal insulation using roofing felt or bituminous compound to protect the wall from capillary moisture.
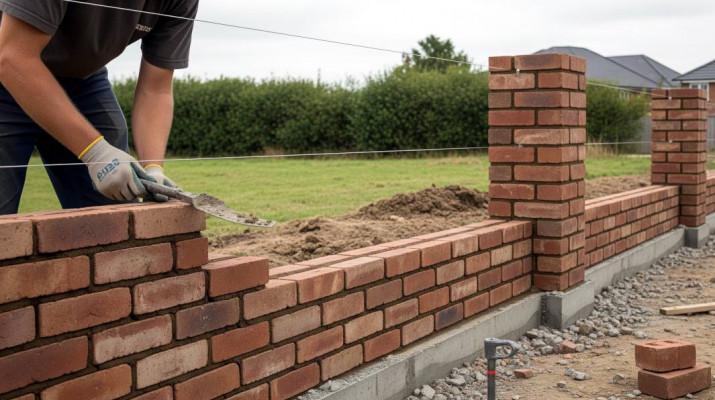
Start laying the first clinker bricks at the corners to establish the fence’s geometry, then fill in the sections between. A practical tip – mix bricks from different pallets since clinker, being a natural product, may vary slightly in shade between batches. This ensures a uniform, appealing color across the entire wall.
How to avoid efflorescence? The role of mortar and moisture protection
The durability and appearance of a clinker wall largely depend on using the right mortar specifically designed for clinker. It must be mixed according to the manufacturer’s instructions, particularly regarding the water-to-dry-material ratio.
- Do not use lime-based mortars, as they promote the formation of salt efflorescence.
- Bricks must be kept dry during construction – ideally stored on pallets and covered with construction foil.
- If bricks or walls are wet, water can penetrate the mortar, dissolve salts, and eventually leave unsightly white stains on the surface.
Fence panels – a harmonious blend of clinker and metal
A common solution is a fence made of brick pillars and bases, with metal panels mounted between them.
- Panels are usually attached using expansion bolts or embedded in mortar.
- They should be mounted on hinges or brackets that compensate for metal’s thermal expansion, preventing cracks in the clinker.
- A “roll course” – bricks laid with their ends facing outward – is often built on the base wall for decoration.
Building posts – strength and aesthetics
Once the outer layer of the clinker post is built, the inside is filled with:
- steel reinforcement bars to enhance load resistance,
- concrete with consistency similar to clinker mortar.
The posts are topped with caps made of clinker or concrete. Their sloped shape helps rainwater run off quickly, reducing moisture penetration into the joints.
Pointing – the final and very important stage
After bricklaying is completed, wait for the wall to reach the proper moisture level before pointing. The decision on when to start should be made by an experienced mason based on current weather conditions.
- Use special clinker mortar with a consistency as recommended by the manufacturer.
- Full joints are essential to prevent water accumulation in recesses.
- Both convex and concave joints are acceptable as long as they adhere tightly to the brick edges.
Do not point during rainfall or when temperatures drop below 5°C.

Final work and fence care
After construction, the fence should be protected from precipitation for at least 7 days, allowing the mortar to cure. The full curing process takes about 4 weeks, during which the wall should also be shielded from intense sunlight.
It’s also a good time to install the gate. Keep in mind that sliding gates require separate foundations to prevent dynamic loads from damaging the clinker and causing cracks.
Finally, it’s recommended to lay a gravel border around the fence to improve water drainage.
Summary
A clinker fence is a long-term investment that pays off in durability, security, and a refined appearance. However, enjoying these benefits for decades requires strict adherence to construction standards. A solid foundation, proper insulation, the right mortar, and professional pointing – these are the keys to success. A well-built clinker fence becomes the home’s showcase and will surely increase its market value.